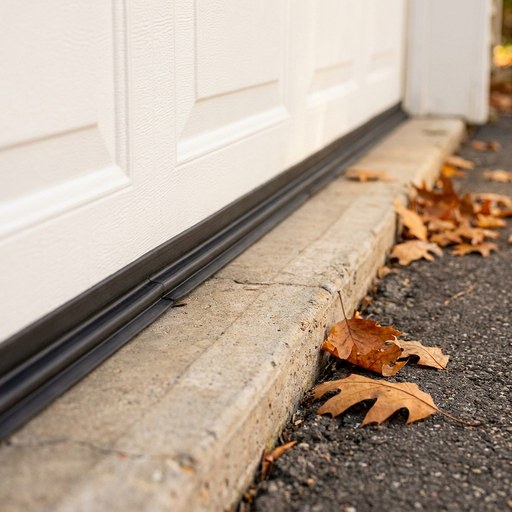
A garage door is the biggest moving hole in your house, and the part that fails is almost always the cheapest one: a strip of rubber along the bottom edge that has been squashed, baked and frozen for ten years. When it stops sealing, you get cold air, blowing leaves, water running in across the slab and — the one people notice last — mice, which can get through a gap of about a quarter inch.
The fix is an afternoon and a small check, and late September is the right time: the vinyl and adhesive still work on a mild day, and the first freeze hasn’t hit yet.
Find the gaps first
Don’t guess where the leak is. The best test costs nothing: close the door, turn off the garage lights, and look at the door from inside on a sunny day. Any line of daylight along the bottom or sides is a gap. No sun? Have someone shine a flashlight along the outside edge while you look from inside.
- Bottom edge: look for a seal that is flattened, cracked, brittle or torn, pulled out of its track, or simply shorter than the door.
- Sides and top: the vinyl stop molding on the jambs should touch the closed door lightly all the way up. Slide a sheet of paper between the two — if it pulls out with no resistance, that spot leaks.
- The floor: a slab that dips or slopes away at the door leaves a gap no bottom seal can close, however new it is. Note where the dips are.
- The wall behind: look where the door frame meets the wall and slab for open joints and cracks.
Most garages need only one of these fixed, and the bottom seal is by far the most common.
Replace the bottom seal
Bottom seals are held in a channel screwed to the base of the door, and the new one slides in the same way the old one came out. Measure your door width first (most are 8, 9, 16 or 18 feet wide) and look at the end of the old seal to see what shape it is — a bulb or a T shape that slides into a channel, or a beaded style that clips into a J-shaped or double channel. The new seal has to match the channel, so take a photo of the old end to compare in the store.
- Pull the old one out. With the door closed, slide it out of the channel from one end. Stubborn ones come out with pliers and a spray of silicone or soapy water on the track.
- Clean the channel with a rag and a screwdriver tip. Dirt and old rubber are what make the new seal hard to feed in.
- Feed the new seal in from one end with a little silicone spray in the channel. Don’t stretch it; let it slide.
- Cut it a bit long, then trim. Vinyl and rubber move with temperature, so let the seal settle for a few minutes before you trim the second end flush with the door.
- Choose the material for your winters. Vinyl hardens and cracks in deep cold; rubber stays flexible. If your garage sees real freezes, pay for rubber.
Do it on a mild afternoon, because a cold seal is stiff and fights you the whole way.
Fix the sides, the top and the threshold
If the daylight test showed light at the sides, the vinyl stop on the jamb is worn or has shifted. New stop molding nails or screws on in a few minutes: close the door, hold the strip snug so it just touches the face, and fasten it every foot or so, so it presses without pinching. The same goes for a torn top seal.
For a floor that dips at the door, the bottom seal usually bridges a gap of up to about three quarters of an inch. Past that — or where the slab is uneven from side to side — the better fix is a threshold seal: a rubber ramp glued to the floor, which fills the low spot and also stops water from running under the door. Sweep and dry the concrete, glue it down with the adhesive the seal calls for, and check the label for a minimum temperature so it cures properly. Cracks in the slab or the apron are worth filling with a flexible polyurethane concrete caulk while you’re there, and small gaps where the frame meets the wall can take a low-expansion foam or caulk.
Test the door, then look at the house
A new seal is thicker than a worn one, and a door that now presses too hard on the floor can trip the opener’s safety reverse. After you finish, do the standard test: lay a 2x4 flat on the floor under the door and close it with the opener. The door should touch the board and reverse. If it stops and reverses well above the board, or fails the test, adjust the opener’s close-limit setting per the manual. Leave the springs and cables alone — they hold enough tension to be dangerous, and that is a job for a garage-door professional.
If your garage is attached, the more important seal is the one between the garage and the house. Weatherstrip that entry door and its threshold so cold air, fumes and dust stay out of the living space, and never run a vehicle in a closed garage. While you’re at it, make sure there’s a working CO detector on the house side. The rest of the winter draft list — windows, doors, the attic hatch — is in our draft-proofing guide.
And if the concrete itself has heaved, cracked or sunk at the door, patching or repouring the apron is a different job — our concrete calculator tells you how many bags to buy. Otherwise, a sealed door means a warmer garage, a drier slab, and no visitors when the temperature drops.
Garage door weatherstripping →
As an Amazon Associate, Clearly earns from qualifying purchases.
Fixing a heaved or cracked apron at the door?
Work out how much concrete the repair takes before you buy the bags — free, no signup.